2. Install Juju
Juju is an open source application modelling tool that allows you to deploy, configure, scale and operate your software on public and private clouds.
In the previous step, we installed, deployed and configured MAAS to use as a foundation for Juju to deploy a fully fledged OpenStack cloud.
We are now going to install and configure the following two core components of Juju to use our MAAS deployment:
- The controller is the management node for a cloud environment. We will be using the MAAS node we tagged with juju to host the Juju controller.
- The client is used by the operator to talk to one or more controllers, managing one or more different cloud environments. As long as it can access the controller, almost any machine and operating system can run the Juju client.
2.1. Package installation
We’re going to start by installing the Juju client on a machine create in ESXI 6.5 with 4 GiB, 2 CPU’s, and 40 GB Storage running Ubuntu 18.04 LTS (Bionic Beaver) with network access to the MAAS deployment. For other installation options, see Getting started with Juju.
- When you install the OS do not forget to install Open SSH
To install Juju, enter the following in the terminal:
sudo add-apt-repository -yu ppa:juju/stable
sudo apt install juju
Note
If you have problems to clone juju repository use command.
sudo apt install software-properties-common
- After the instalation is complete you can change the IP addres (if it necesary).
- Go to /etc/netplan/ and rename the file – 01-netcfg.yaml– using sudo nano command, to stop DHCP use folloing settings :
# This file describes the network interfaces available on your system
# For more information, see netplan(5).
network:
version: 2
renderer: networkd
ethernets:
ens160:
dhcp4: no
addresses: [192.168.40.17/24]
gateway4: 192.168.40.1
nameservers:
addresses: [8.8.8.8,8.8.4.4]
2.2. Client configuration
The Juju client needs two pieces of information before it can control our MAAS deployment.
- A cloud definition for the MAAS deployment. This definition will include where MAAS can be found and how Juju can authenticate itself with it.
- A separate credentials definition that’s used when accessing MAAS. This links the authentication details to the cloud definition.
To create the cloud definition, type juju add-cloud mymaas to add a cloud called mymaas. This will produce output similar to the following:
Cloud Types
  maas
  manual
  openstack
  vsphere

Select cloud type:
Enter maas as the cloud type and you will be asked for the API endpoint URL. This URL is the same as the URL used to access the MAAS web UI in the previous step: http://<your.maas.ip>:5240/MAAS/.
With the endpoint added, Juju will inform you that mymass was successfully added. The next step is to add credentials. This is initiated by typing juju add-credential mymaas. Enter admin when asked for a credential name.
Juju will output the following:
Enter credential name: admin

Using auth-type "oauth1".

Enter maas-oauth:
The oauth1 credential value is the MAAS API key for the admin user. To retrieve this, login to the MAAS web UI and click on the admin username near the top right. This will show the user preferences page. The top field will hold your MAAS keys:
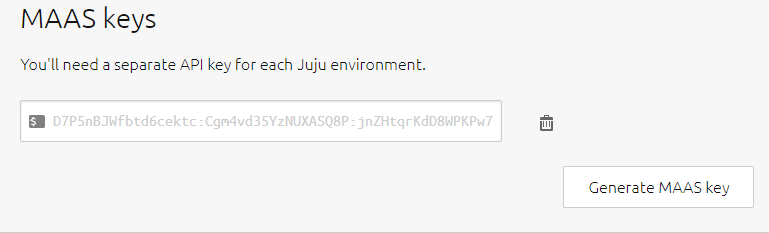
Copy and paste this key into the terminal and press return. You will be informed that credentials have been added for cloud mymaas.
You can check the cloud definition has been added with the juju clouds command, and you can list credentials with the juju credentials command.
2.3. Testing the environment
The Juju client now has everything it needs to instruct MAAS to deploy a Juju controller.
But before we move on to deploying OpenStack, it’s worth checking that everything is working first. To do this, we’ll simply ask Juju to create a new controller for our cloud:
juju bootstrap --constraints tags=juju mymaas maas-controller
The constraint in the above command will ask MAAS to use any nodes tagged with juju to host the controller for the Juju client. We tagged this node within MAAS in the previous step.
The output to a successful bootstrap will look similar to the following:
Creating Juju controller "maas-controller" on mymaas
Looking for packaged Juju agent version 2.4-alpha1 for amd64
Launching controller instance(s) on mymaas...
 - 7cm8tm (arch=amd64 mem=48G cores=24)
Fetching Juju GUI 2.14.0
Waiting for address
Attempting to connect to 192.168.40.185:22
Bootstrap agent now started
Contacting Juju controller at 192.168.40.185 to verify accessibility...
Bootstrap complete, "maas-controller" controller now available.
Controller machines are in the "controller" model.
Initial model "default" added.
If you’re monitoring the nodes view of the MAAS web UI, you will notice that the node we tagged with juju starts deploying Ubuntu 18.04 LTS automatically, which will be used to host the Juju controller.
If you wanna use juju web UI type command:
juju gui
You will see the username and password for log in Juju which will be something like that:
GUI 2.14.0 for model "admin/default" is enabled at:
https://192.168.40.52:17070/gui/u/admin/default
Your login credential is:
username: admin
password: 1e4e614eee21b2e1355671300927ca52
After you see the username and password copy and paste it in to web UI
This should look something like that:
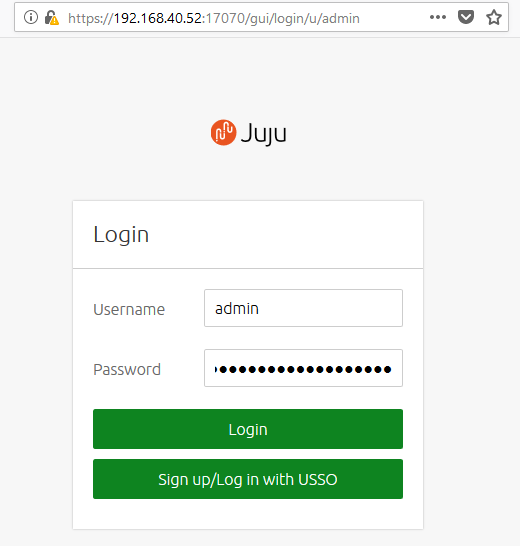
2.4. Next steps
We’ve now installed the Juju client and given it enough details to control our MAAS deployment, which we’ve tested by bootstrapping a new Juju controller. The next step will be to use Juju to deploy and link the various components required by OpenStack.